

Printing a large terrain relief in tiles with the 3D Topography Split preset
Difficulty: Intermediate. Time: a weekend of printing. Best methods, in order: 3D printing, laser cutting.
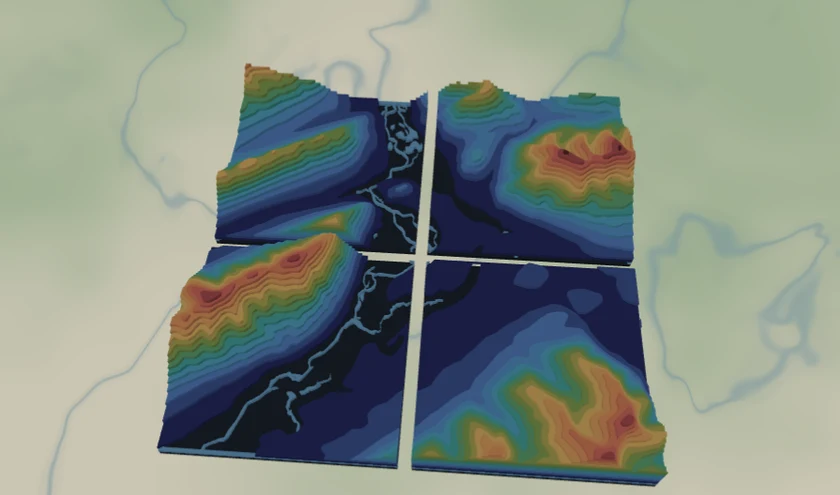
A big relief rarely fits one print bed. This preset sizes the contours to 420 x 420 mm and splits them into a 2x2 grid of ~210 mm tiles that fit common FDM beds (Ender, Prusa, Bambu) and join into one large model. The contours are sliced from a single source, so the terrain steps line up across every tile boundary.
What You'll Need
3D printing
- An FDM printer (210 mm tiles fit a 220 x 220 mm bed), PLA in stone gray or white
- An STL/3MF-capable slicer
- Glue or interlocking pins to join printed tiles
Laser cutting
- Thin contour sheets and a backing board if you'd rather cut the split layers and stack them per tile
Step 1 - Start from the preset
Open the 3D Topography Split preset. It loads on the peaks near Banff with split already enabled. Search your terrain and keep zoom ~11.5-12.5 so the contour terraces read well.
Step 2 - Check the split and bands
- The Tile for large format panel is already on: 420 x 420 mm output, 2 x 2, giving four ~210 mm tiles. Adjust output size or columns/rows to match your bed - the shown tile size updates live.
- Tune the elevation bands first (delete empty high layers, bracket your terrain) - the same tuning as the Topography preset.
Step 3 - Export the tiles
- With split on, STL tiles (ZIP) and 3MF tiles (ZIP) produce one printable file per tile, each geometry-clipped to its region so the stepped relief is correct.
- Print tiles one at a time; assemble into the full relief afterward.
Choose Your Build Method
3D printing
- Open each tile STL/3MF and print flat, no supports, at 0.12-0.16 mm for crisp contour steps.
- Keep track of tile order using the file names (tile-r1-c1 ...).
- Glue the printed tiles edge-to-edge; the contour steps continue across seams because every tile is sliced from one source.
- Scale up if you want a bigger relief - increase the output size in the preset and re-split.
Make It Yours
- Match your printer: set the output so each tile lands just under your bed size (e.g. 256 mm tiles for a Bambu).
- Go large: a 3 x 3 grid of 200 mm tiles makes a ~600 mm tabletop relief.
- Hypsometric tints via 3MF for banded color across the assembled model.
- Add a route layer tracing a favorite trail or ski run over the contours before splitting.
Keep up with MyLaserTools.
Email me about new tools, product updates, tutorials, and occasional MyLaserTools offers. Unsubscribe at any time.
© 2026 MyLaserTools.com. All rights reserved.